Small overlap front
The small overlap front evaluation consists of a driver-side and a passenger-side component. If the results of the two evaluations differ, then the combined small overlap rating is equal to the lower rating.
Driver-side
- Rating applies to 2023-25 models
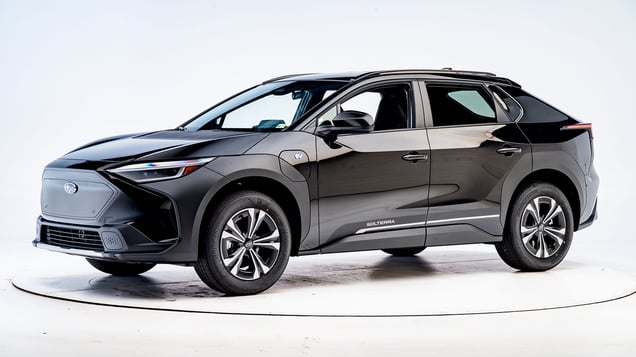
Tested vehicle: 2023 Subaru Solterra Touring 4-door 4wd
The Subaru Solterra and Toyota bZ4X, both all-new electric vehicles, were introduced for the 2023 model year.
| Evaluation criteria | Rating |
|---|---|
| Overall driver-side evaluation | |
| Structure and safety cage | |
| Driver injury measures | |
| Head/neck | |
| Chest | |
| Hip/thigh | |
| Lower leg/foot | |
| Driver restraints and dummy kinematics | |
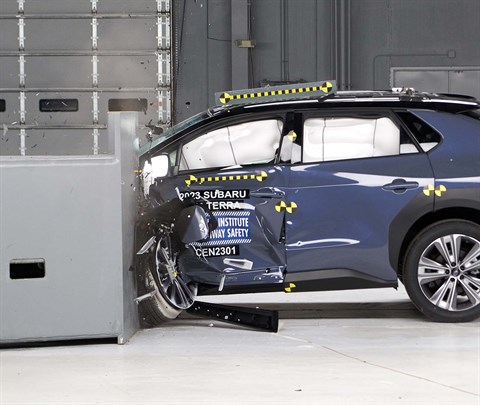
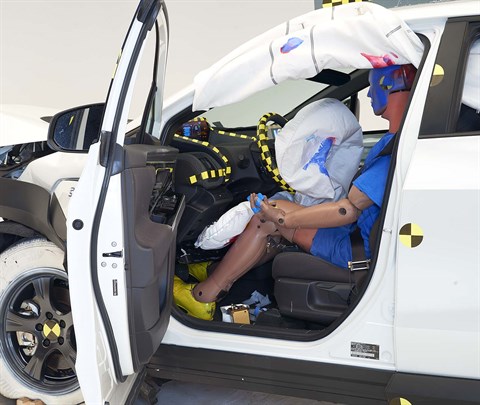
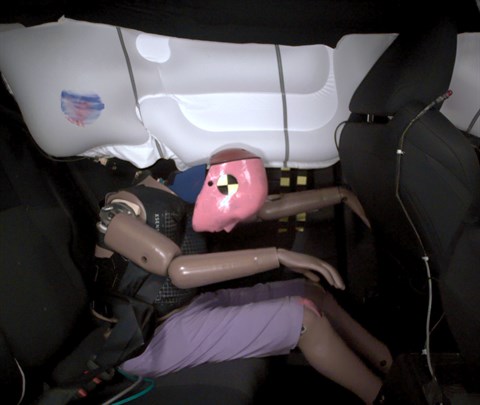
Action shot taken during the driver-side small overlap frontal crash test.
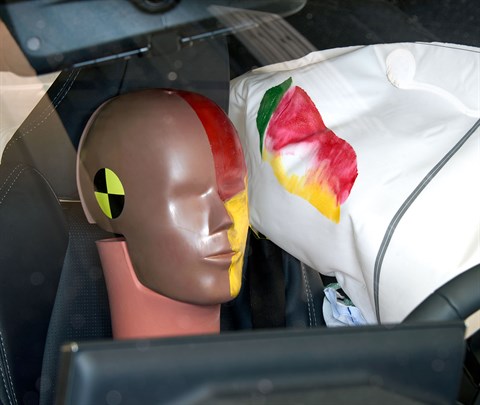
The dummy's position in relation to the door frame, steering wheel, and instrument panel after the crash test indicates that the driver's survival space was maintained well.
The frontal and side curtain airbags worked well together to keep the head from coming close to any stiff structure or outside objects that could cause injury.
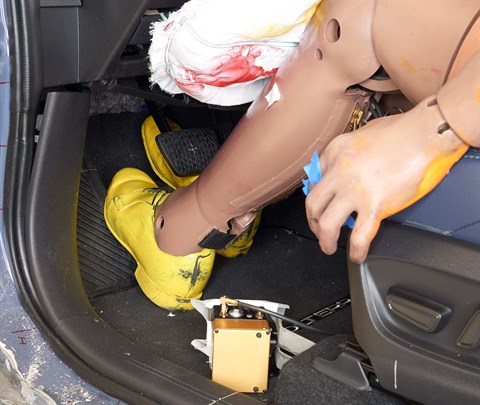
The driver's space was maintained well, and risk of injuries to the dummy's legs and feet was low.
Technical measurements for this test
Passenger-side
- Rating applies to 2023-25 models
Tested vehicle: 2023 Subaru Solterra Touring 4-door 4wd
The Subaru Solterra and Toyota bZ4X, both all-new electric vehicles, were introduced for the 2023 model year. Passenger-side small overlap frontal ratings are assigned by the Institute based on a test of a 2023 Solterra conducted by Subaru.
| Evaluation criteria | Rating |
|---|---|
| Overall passenger-side evaluation | |
| Structure and safety cage | |
| Passenger injury measures | |
| Head/neck | |
| Chest | |
| Hip/thigh | |
| Lower leg/foot | |
|
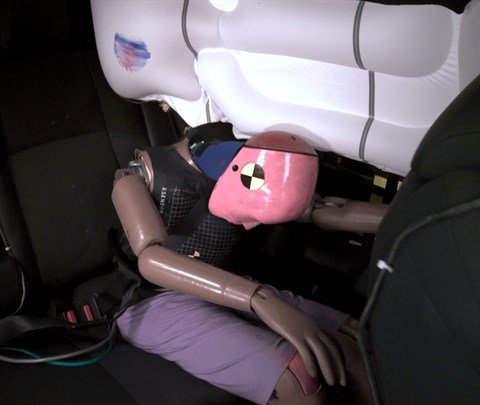
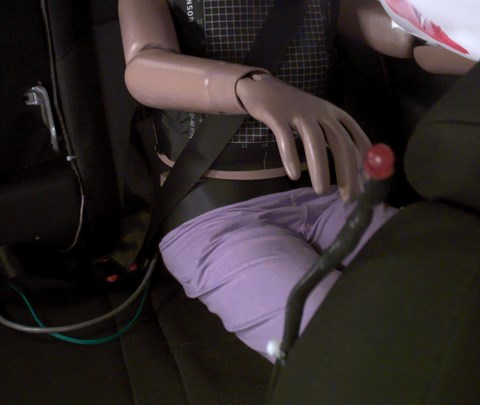
Passenger restraints and dummy kinematics
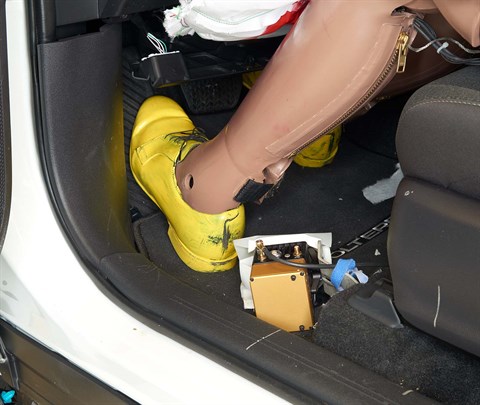
The dummy’s head maintained only partial engagement with the frontal airbag, moving into the gap between the frontal and side curtain airbags and leaving the head vulnerable to contact with forward structure. | |
| Driver injury measures | |
| Head/neck | |
| Chest | |
| Hip/thigh | |
| Lower leg/foot | |
| Driver restraints and dummy kinematics | |
Technical measurements for this test
Moderate overlap front: original test
Rating applies to 2023-24 models
Tested vehicle: 2023 Subaru Solterra Premium 4-door 4wd
The Subaru Solterra and Toyota bZ4X, both all-new electric vehicles, were introduced for the 2023 model year.
| Evaluation criteria | Rating |
|---|---|
| Overall evaluation | |
| Structure and safety cage | |
| Driver injury measures | |
| Head/neck | |
| Chest | |
| Leg/foot, left | |
| Leg/foot, right | |
| Driver restraints and dummy kinematics | |

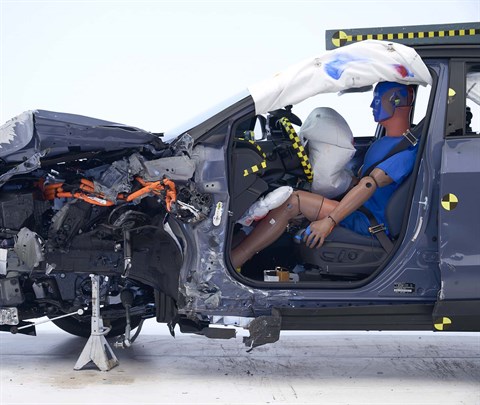
Action shot taken during the moderate overlap frontal crash test.
The dummy's position in relation to the steering wheel and instrument panel after the crash test indicates that the driver's survival space was maintained well.

Smeared greasepaint indicates where the dummy's head contacted the side curtain airbag during rebound.
Forces on the right lower leg were just high enough to indicate the possibility of injuries.
Technical measurements for this test
Moderate overlap front: updated test
Rating applies to 2024-25 models
Tested vehicle: 2024 Subaru Solterra Premium 4-door 4wd
The Subaru Solterra, an all-new electric vehicle, was introduced for the 2023 model year. These ratings do not apply to the Toyota bZ4X.
| Evaluation criteria | Rating |
|---|---|
| Overall evaluation | |
| Structure and safety cage | |
| Driver injury measures | |
| Head/neck | |
| Chest | |
| Thigh/hip | |
| Leg/foot | |
| Driver restraints and dummy kinematics | |
| Rear passenger injury measures | |
| Head/neck | |
| Chest | |
| Thigh | |
| Rear passenger restraints and dummy kinematics | |
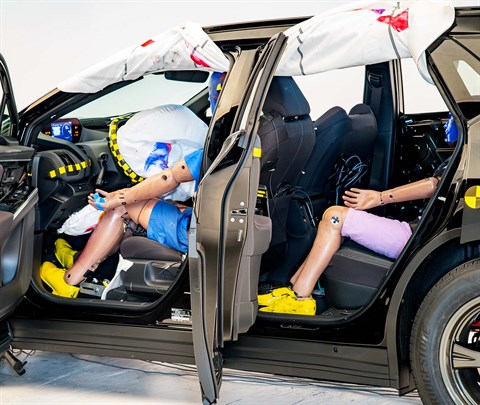
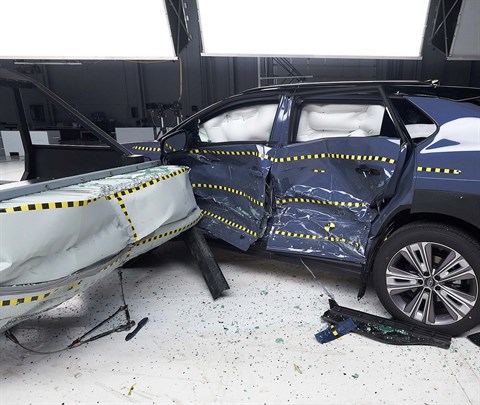
View of the vehicle after the crash showing the airbags and damage to the occupant compartment.
The rear passenger dummy's head remained a safe distance from the front seatback.
Rear passenger dummy injury values indicate a low risk of injury to the head or neck and chest. During the crash, the shoulder belt remained in an ideal position on the dummy’s chest.
The rear passenger dummy's lap belt remained in the ideal position on the pelvis.
Technical measurements for this test
Side: updated test
Rating applies to 2023-25 models built after October 2022
Tested vehicle: 2023 Subaru Solterra Touring 4-door 4wd
The Subaru Solterra and Toyota bZ4X, both all-new electric vehicles, were introduced for the 2023 model year. Beginning with 2023 models built after October 2022, reinforcements were implemented to improve occupant protection in side impact crashes. (Information about when a specific vehicle was manufactured is on the certification label typically affixed to the driver door or adjacent B-pillar.)
| Evaluation criteria | Rating |
|---|---|
| Overall evaluation | |
| Structure and safety cage | |
| Driver injury measures | |
| Head/neck | |
| Torso | |
| Pelvis | |
| Driver head protection | |
| Rear passenger injury measures | |
| Head/neck | |
| Torso | |
| Pelvis | |
|
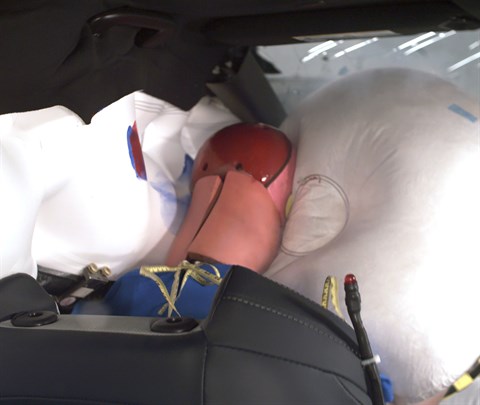
Rear passenger head protection
Part of the dummy's head moved beyond the rear portion of the side curtain airbag and contacted the C-pillar. The head protection is inadequate. | |
View of the vehicle just after the crash test.
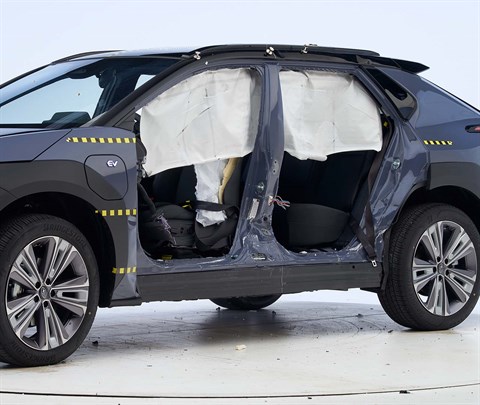
View of the vehicle after the crash with doors removed, showing the side airbags and damage to the occupant compartment.
Smeared greasepaint shows where the driver dummy's head was protected from being hit by hard structures by the side airbags.
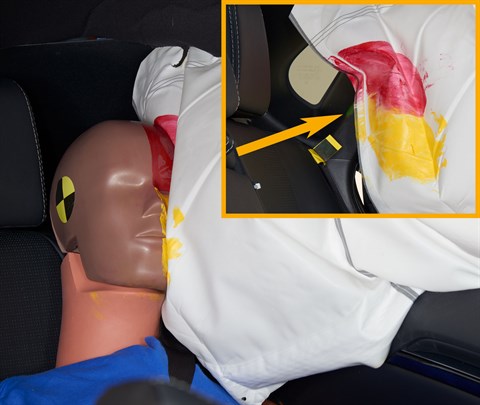
Smeared greasepaint shows where the rear passenger dummy’s head moved beyond the side curtain airbag and contacted the C-pillar.
Technical measurements for this test
Headlights
Trim level(s)
- All trims
| Evaluation criteria | Rating |
|---|---|
| Low-beam headlight type | LED projector |
| High-beam headlight type | LED projector |
| Curve-adaptive? | No |
| High-beam assist? | Yes |
|
Overall rating | |
| Distance at which headlights provide at least 5 lux illumination: | |
Low beams
On the straightaway, visibility was good on the left side of the road and fair on the right side. On curves, visibility was good on the gradual left and both right curves and fair on the sharp left curve.
The low beams never exceeded glare limits.
High beams
On the straightaway, visibility was good on both sides of the road. On curves, visibility was good on both right curves and fair on both left curves.
High-beam assist compensates for some limitations of this vehicle's low beams on the straightaway, on both left curves and on the sharp right curve.
Technical measurements for this test
Front crash prevention: pedestrian
Seat belt reminders
Rating applies to 2023-25 models
| Evaluation criteria | Rating |
|---|---|
| Overall evaluation | |
| Front row | |
| Unbelted occupant alert (audible & visual) | |
| Initiation time | |
| Duration | Long enough (90+ seconds) |
| Volume | |
| Audio frequency | |
| Second row | |
| Startup status alert (visual) | |
| Initiation time | |
| Duration at least 60 seconds | |
| Belt disengaged alert (audible & visual) | |
| Initiation time | |
| Duration at least 30 seconds | |
| Volume | |
| Audio frequency | |
Technical measurements for this test
Child seat anchors
Rating applies to 2023-25 models
| Evaluation criteria | Rating |
|---|---|
| Overall evaluation | |
| Vehicle trim | Touring |
| Seat type | leatherette |
This vehicle has 2 rear seating positions with complete child seat attachment (LATCH) hardware.
It has 1 additional seating position with a tether anchor only.
| Evaluation criteria | Rating |
|---|---|
| Overall evaluation | |
| Vehicle trim | Touring |
| Seat type | leatherette |
| Rating icon | Rating |
|---|---|
| G | Good |
| A | Acceptable |
| M | Marginal |
| P | Poor |
| Seating positions that rely on borrowed lower anchors or have only a tether anchor available are not rated. | |
thether anchor symbol | Tether anchor |
lower anchor symbol | Lower anchors |
| Lower anchor(s) can be borrowed from adjacent positions(s) | |
| No hardware available |
Details by seating position
| Position | Rating |
|---|---|
| 1 | |
| Tether anchor | |
| easy-to-find location | |
| no other hardware could be confused for anchor | |
| Lower anchors | |
| not too deep in seat | |
| not too much force needed to attach | |
| easy to maneuver around anchors | |
| 2 | |
| Tether anchor | |
| easy-to-find location | |
| no other hardware could be confused for anchor | |
| Lower anchors | |
| none available | |
| 3 | |
| Tether anchor | |
| easy-to-find location | |
| no other hardware could be confused for anchor | |
| Lower anchors | |
| not too deep in seat | |
| not too much force needed to attach | |
| easy to maneuver around anchors |
Technical measurements for this test